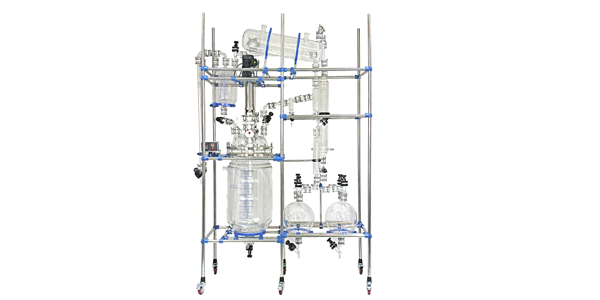
A rotary evaporator, or rotovap, is an essential piece of equipment in various laboratories, especially in the pharmaceutical, chemical, and biotechnological industries. It is primarily used for efficient solvent removal, concentrating active ingredients, and purifying compounds. If you’re setting up a rotary evaporator for the first time or looking to optimize your current setup, understanding the correct procedures will ensure better efficiency and consistency. Here’s a step-by-step guide on how to set up a rotary evaporator, with important tips on maximizing its performance.
1. Unbox and Inspect the Rotary Evaporator
Before starting, ensure that your rotary evaporator is delivered with all components intact. Typically, a rotary evaporator includes the evaporator unit, a rotary flask, a condenser, a motor, a vacuum pump, and a heating bath. Check each component for any damages during shipping and ensure that they are clean and free from any foreign particles that might affect their function.
2. Position the Rotary Evaporator
The ideal location for the rotary evaporator is a stable, level surface. It should be positioned away from heat sources and any vibrations that could affect the accuracy of the experiment. Additionally, ensure the space allows for proper airflow, especially around the condenser.
If your laboratory doesn’t have a dedicated fume hood, placing the evaporator under proper ventilation is critical, as the evaporation process may release volatile solvents.
3. Assemble the Components
Assemble the main components of the rotary evaporator:
-
Rotary Flask: Attach the rotary flask to the motor’s rotating assembly. This flask holds the sample solution that will be processed.
-
Condenser: Connect the condenser to the evaporator body. Ensure that the water or cooling fluid circulates properly through the condenser to facilitate the condensation of evaporated solvent.
-
Heating Bath: Fill the heating bath with water or oil (depending on your rotary evaporator model) to ensure the temperature can be controlled. The bath must be positioned just beneath the rotary flask to maintain optimal heating.
-
Vacuum Pump: The vacuum pump creates a low-pressure environment, reducing the boiling point of the solvent. Ensure the pump is properly connected and functioning.
4. Set the Desired Temperature
Set the temperature of the heating bath. The optimal temperature will depend on the solvent being evaporated, but it typically ranges between 30°C and 70°C for most organic solvents. The temperature should be high enough to facilitate evaporation but not so high as to cause degradation of sensitive compounds.
5. Adjust the Rotation Speed
Set the rotation speed of the rotary flask. The speed is crucial because it determines the surface area available for evaporation. A higher rotation speed increases the evaporation rate by maximizing the contact area between the solvent and the heated flask. Typically, the rotation speed ranges between 40-120 RPM (revolutions per minute).
6. Create a Vacuum Environment
Connect the vacuum pump to the evaporator and ensure it is working. The vacuum reduces the atmospheric pressure around the sample, lowering the boiling point of the solvent. This allows for gentle evaporation at lower temperatures, which is crucial for preserving the integrity of heat-sensitive compounds. Fine-tune the vacuum until the desired pressure is achieved.
7. Monitor the Evaporation Process
Once everything is set up, initiate the rotary evaporator and closely monitor the evaporation process. Check the temperature of the heating bath, the vacuum level, and the rotation speed to ensure everything is operating smoothly. If needed, adjust these parameters as the process progresses.
Pro Tip: To prevent overfilling the rotary flask, never exceed the recommended volume capacity for the flask. Overfilling can cause solvent splashing and reduce the efficiency of the process.
8. Post-Evaporation Procedures
Once the solvent is fully evaporated, stop the rotation and turn off the vacuum pump. Allow the apparatus to cool before handling. Clean all components of the rotary evaporator, especially the rotary flask, to avoid any contamination from residual solvents.
Why Choose the Right Rotary Evaporator?
Choosing a high-quality rotary evaporator ensures the highest performance in your laboratory processes. At Nantong Purui Technical Instrumen , we offer advanced rotary evaporators designed to provide maximum efficiency and reliability. Whether you’re in the pharmaceutical or chemical industry, our products are built to meet your specific needs.
Setting up a rotary evaporator may seem complex at first, but with the proper steps, you can ensure smooth operation and consistent results. By following these guidelines, you can achieve efficient solvent removal and compound purification. If you’re looking for a reliable and advanced rotary evaporator, check out our range of products at Glass Reactor System.
For those looking to optimize their laboratory equipment further, make sure to explore our range of glass reactors and vacuum pumps for enhanced performance.


